credits: Heather Smoke – “Curly Girl Kitchen”
Un nuovo How to – Dietro le quinte realizzato da Heather “Curly Girl Kitchen“ protagonista poco tempo fa di un guest post da leccarsi i baffi, nel caso ve lo siate perso potete leggere e perché no, provare, la sua ricetta qui: muffin inglesi con uvetta.
Potete seguire Heather anche su questi social:
credits: Heather Smoke – “Curly Girl Kitchen”
Quando Sonia mi è ha chiesto di condividere alcuni dei miei dietro le quinte, ero un po’ titubante, dal momento che non sono una fotografa professionista so di avere ancora tanto da imparare ma spero che condividendo alcuni dei miei trucchi e suggerimenti possa ispirare altri che sono all’inizio per poter migliorare le proprie fotografie.
Per i primi due anni di blog ho realizzato tutte le mie foto utilizzando una Casio EX- FH20. È stata la fotocamera perfetta per iniziare ma tornando indietro e guardando alcuni dei miei post precedenti vedrete che anche una buona macchina fotografica nelle mani di un fotografo inesperto può causare alcuni problemi. L’illuminazione era un grande problema, ho subito imparato che non usare il flash era una buona idea, così come cercare di fotografare il cibo sul ripiano della cucina dove non avendo luce naturale ma luce artificiale si creano un sacco di ombre poco appetibili.
Per il mio blog-anniversario ho condiviso alcune foto di ogni mese del primo anno dove si può notare quanto sia migliorata con molte ore di pratica e sperimentazione.
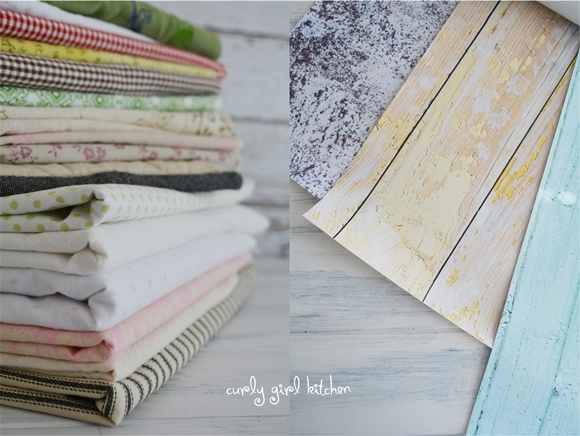
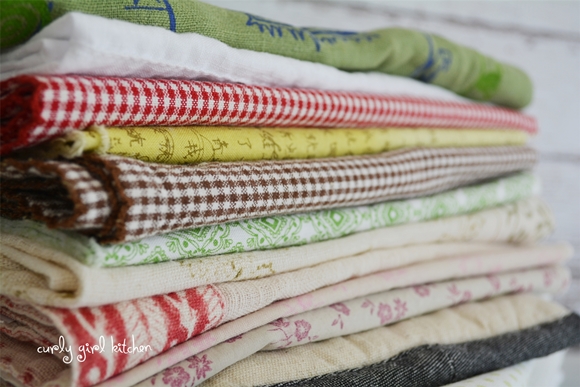
Nel corso del tempo ho raccolto molti props per la fotografia, i miei preferiti sono piatti carini e argenteria antica con un sacco di tovaglioli o scarti di stoffa. Sono più felice quando aggiungo un sacco di “oggetti” all’interno delle mie foto. Una forchetta su un tovagliolo, un barattolo dietro il piatto, una ciotola. Questi oggetti aggiungono elementi di interesse e attirano l’occhio di nuovo al soggetto principale quando lo sfondo è sfuocato. Ogni fotografia è un processo di apprendimento, scatto un paio di foto, sposto gli elementi, scatto qualche altra foto e sposto tutto intorno e così via fino a quando non mi sembra che tutto funziona.
credits: Heather Smoke – “Curly Girl Kitchen”
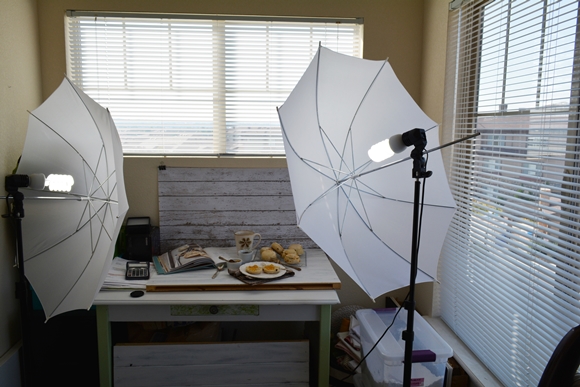
Quando ero agli inizi usavo la carta e il cartoncino per i fondi e come pannelli riflettenti, posizionavo tutto sul pavimento del soggiorno o sul patio per realizzare le mie fotografie. Poi ho ricevuto un kit di luci per regalo e dato che ero stanca di mettere tutto sul pavimento (anche perché poi dovevo mettere tutto a posto) ho deciso di convertire una piccola camera (che in realtà era destinata ad essere un ufficio) accanto al nostro salotto, trasformandola così in un improvvisato studio fotografico.
Ho sacrificato la mia scrivania facendola diventare la base per scattare le mie fotografie (dal momento che cucino e scatto foto da due a cinque volte alla settimana). La scrivania ha finestre alla sua destra e sopra, è il luogo ideale per il mio lavoro. Anche con le finestre però la luce naturale non è abbastanza e spesso uso ancora il mio ombrello luci per aggiungere luce di fronte al soggetto da fotografare.
credits: Heather Smoke – “Curly Girl Kitchen”
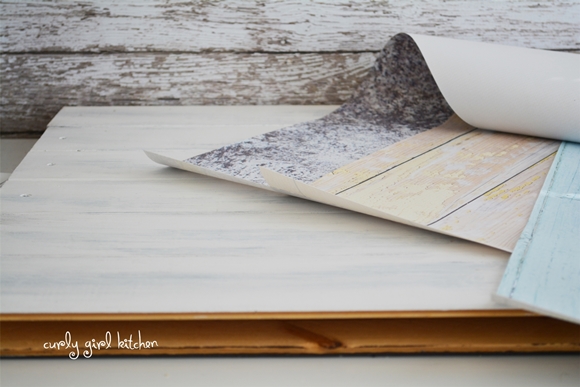
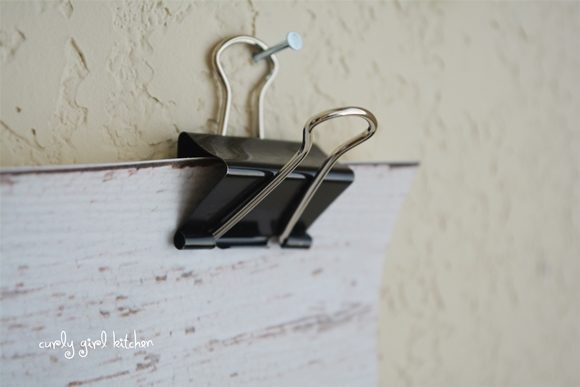
Quando mi sono stancata di usare la carta il mio ragazzo mi ha aiutato a costruire fondali di legno acquistati dal ferramenta. Ho dipinto ogni lato dei pallet, uno chiaro e uno scuro e per un po’ ho usato solo i pallet, così come i tessuti utilizzati come sfondi.
Per il mio compleanno il mio fidanzato mi ha regalato una macchina fotografica reflex digitale (una Nikon D5200 con due lenti 18-55mm e 55 -300mm) tutte le foto da Luglio 2013 sono scattate con la mia nuova macchina fotografica. Devo ancora mettere in pratica le impostazioni manuali, finora ho usato solo la modalità auto che funziona abbastanza bene ma ho raggiunto un punto in cui devo applicarmi di più e imparare le impostazioni manuali per fare grandi foto.
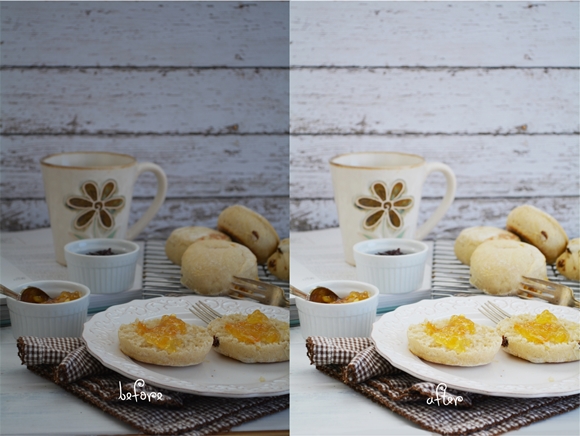
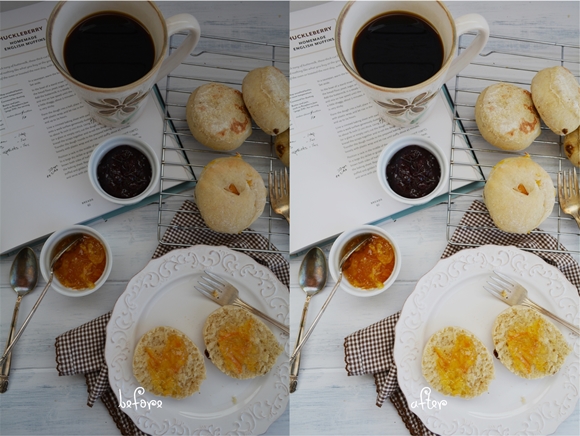
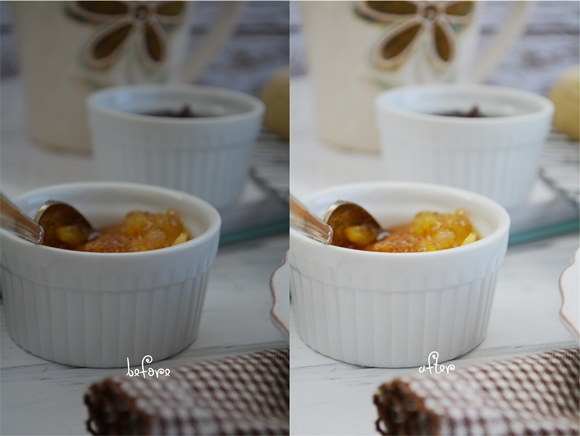
Per l’editing di solito non faccio nulla di più che illuminare un po’ le foto e magari aggiungere un tocco in più di contrasto, come si può notare nelle foto del “prima e dopo”. Nella seconda foto a partire dall’alto, ho ricolorato solo il bordo inferiore dove per sbaglio ho preso il bordo del pallet di legno durante lo scatto. Avrei potuto ritagliarla ma dal momento che il colore era bianco è stato facile ricolorare la parte di bianco.
Spero che questi suggerimenti possano tornare utili e siano di ispirazione per le vostre fotografie!
credits: Heather Smoke – “Curly Girl Kitchen”
Original version
How to – Behind the scenes by Heather “Curly Girl Kitchen“.
My Guest Post on OPSD is here: English Muffins with Raisins and Dried Apricots
Follow me:
When I was asked to share some of my behind the scenes photography tips, I was a little hesitant to accept, since I am not a professional photographer and still have so much to learn.But I hope that by sharing some of my tips and tricks, I can inspire others who are just starting out on how to improve their photography.
For my first two years of blogging, I took all of my photos using a wonderful point and shoot, a Casio EX-FH20. It was the perfect camera for me to start with, but if you look at some of my earlier posts, you will see that even a good camera in the hands of an unskilled photographer can result in some very poor photos. Lighting was a big problem for me, and I quickly learned that using the flash on my camera was a bad idea, as well as trying to photograph food on my kitchen counter, where we have no natural light and very harsh overhead lighting that creates lots of unappetizing shadows.
For my one-year anniversary post, I shared some photos from each month of that first year, and you can see just how much I improved in one year with many hours of practice and experimentation.
Over time, I’ve gathered more photography props, my favorites being cute dishes and antique silverware, with plenty of napkins or scraps of fabric. I find that I am happiest with my photos when I’ve added plenty of “layers” within the photo. A fork on a napkin, a jar set behind the plate, a bowl a little further back. These layers add elements of interest, and draw the eye back to the main subject when the background is out of focus. And every photography shoot is a learning process, as I take a few photos, move items around, take a few more photos, move everything around a little more, etc. until I feel like it works.
credits: Heather Smoke – “Curly Girl Kitchen”
When I was starting out, I used paper or poster board for backdrops and reflective boards, and I would set everything up on the living room floor next to the patio door for my photography shoots. But then I received a lighting kit as a gift, and since I was tired of constantly setting everything up on the floor only to have to put it all away afterwards, I decided to convert a small room (which really is intended to be an office) next to our living room into a makeshift photography studio.
I sacrificed my desk to become a permanent setup for photography shoots (since I am baking and shooting anywhere from two to five times a week), and as the desk has windows above and to the right, it was the most ideal location in our small condo for my work. Even with the windows, though, the natural light is often not enough, and I still use my umbrella lights to add light in front of my subject.
credits: Heather Smoke – “Curly Girl Kitchen”
Once I tired of using paper, my boyfriend helped me build my own wooden pallets out of lumber we purchased from the hardware store. I painted each side of the pallets, one light and one dark, and for a while, I used just my pallets, as well as lengths of fabric, as backdrops.
For my birthday this year, I received a DSLR camera (a Nikon D5200 with two lenses, 18-55mm and 55-300mm) from my loving and supportive boyfriend, and have taken all of my photos since July 2013 with my new camera. I have yet to practice the manual settings, and so far have only used it on auto, which works quite well, but I have reached a point where I know I need to push myself to learn the manual settings as well, if I want to take truly great photos.
credits: Heather Smoke – “Curly Girl Kitchen”
I keep my post-editing very simple, and usually do nothing more than just brighten the photos up a little, and maybe add a touch more contrast. In my before and after photos, you can see the difference that just a little more light added in making these really stand out. Other than the lightening, you can see that in one, I recolored just the bottom edge where I accidentally caught the edge of my wooden pallet in the frame. I could have cropped it as well, but since the color at the bottom was white, it was just as easy to recolor that portion white.
I hope that you find these tips helpful and inspiring in your own photography!
Puoi trovare altri interessanti articoli How To – Dietro le quinte cliccando qui.
You can find other “Behind the scenes” article here: qui.

Wow, io ho una Nikon D5100 con un obiettivo 18-55, ero estremamente fissata che per fare belle foto servisse a tutti i costi il 50 fisso …. grazie
Grazie a te Simona, 50 mm a parte, i tuoi free printables sono bellissimi, complimenti :) buon fine settimana!
Posso saccheggiare tutte le stoffe? :D
;) ho pensato la stessa cosa, e non solo per le stoffe!
Io ho iniziato da poco a cimentarmi con le foto e mi sto attrezzando. Ho comprato il pallet ma ho bisogno di più luce. Invidio quelle che hai tu! Le voglio! :-)
;) ce le potremmo scambiare, come i bimbi con le figurine dei calciatori!
Splendide! Io ho iniziato domenica a fare prove seguendo i tuo consigli Sonia e oggi, leggendo questo post sono ancora più determinata a impegnarmi nelle prove e negli scatti per il mio blog :-)
Devo iniziare a collezionare dei props più mirati, questo in effetti mi manca!
Sarà uno dei miei propositi per l’anno nuovo ^_^
Grazie mille per aver condiviso queste splendide esperienze!
Un abbraccio!
Cecilia K
Ma grazie a te Cecilia, un grande abbraccio!
Bellissimo post! Belle le luci, gli sfondi legnosi… Un’atmosfera che mi piace molto :)
A chi lo dici! Adoro <3